Digital FXtbook
Easy Contacts
  • Home
    • Software
    • The Author
    • Former Students Hall of Fame
    • A tribute....
    • Treasure Hunt
  • Video Game Training
    • 3d Motion Graphics >
      • Unity >
        • Unity Essentials >
          • Unity's Interface >
            • Our First Assignment
          • Modeling and Level Design >
            • The Essentials
            • The Floor is Lava Name Project
            • ProBuilder >
              • ProBuilder Pro Skater Park
              • ProBuilder Pro Skater Park 2
              • ProBuilder Image Planes
              • ProBuilder Steve Modeling
              • ProBuilder Steve Texturing
          • Programming >
            • Getting Started with Scripting
            • Default Scripting
            • Scripting a Game Object
          • Real Time Audio >
            • Adding Background Music
            • 3-d Audio effects
          • 2d Essentials >
            • 2d Game Objects
            • Objects on 2d Game Objects
        • Creative Core >
          • Introduction to Creative Core
          • Shaders and Materials
          • Lighting
          • Animation
          • VFX
          • Cameras
          • Post Processing
          • Audio
          • User Interface
          • Proto-Typing
    • C# Programming >
      • Visual Studios >
        • First Program >
          • Getting input from the User
        • Comments >
          • PsuedoCode
        • Variable Types >
          • AlphaNumeric Variables
          • Numeric Variables
          • Putting it all together
        • Operators >
          • Assignment and Arithmetic Operators >
            • Use of Parenthesis
            • When is Easter??
          • Comparison and Logical Operators >
            • Logical Data, Illogical Assignment
          • Random Class
        • Conditional Statements >
          • Number validator
          • Number tester
          • Speed Camera
        • Loops >
          • For Loops >
            • Adding Numbers
          • For Each Loops
        • Arrays >
          • Simple Arrays
          • Complex Arrays
      • Intro to Unity >
        • Unity Essentials >
          • Unity's Interface
          • The Essentials
          • Programming >
            • Getting Started with Scripting
            • Default Scripting
            • Scripting a Game Object
        • Intro to Programming 1 >
          • Player Control 1 >
            • Player Control 1.2
            • Player Control 1.3
            • Player Control 1.4
          • Player Control 2 >
            • Player Control 2.2
            • Player Control 2.3
            • Player Control 2.4
          • Player Control Challenge
        • Intro to Programming 2 >
          • Sound and Effects >
            • Sound and Effects 3.2
            • Sound and Effects 3.3
            • Sound and Effects 3.4
          • GamePlay
          • User Interface
          • Feedback and Testing
          • Next Steps
        • Intro to Programming 3 >
          • Manage Scene Flow and Data
          • Apply Object-Oriented Principles
    • Modeling and Rigging >
      • Modeling >
        • Introduction: The Temple
        • Name Text Curve
        • Character Modeling >
          • Minecraft Steve
          • Minecraft Steve UV
          • Roblox Character modeling
          • Big Daddy
          • Character Modeling Legion the Geth
          • Character Modeling Geth Armor
        • Weapons >
          • Minecraft Tools and Weapons
          • Minecraft Movie Pickaxe
          • Minecraft Movie Sword
          • Thor's Hammer
          • Hammer
          • LOL Sword
          • Sword of Light
          • Buzz Axe
          • Weapon
      • Rigging >
        • Intro to Rigging
        • Controls
        • Rigging Basics
        • Rigging Creating Skeletons
        • Rigging: Body Controls
        • Rigging: Hands
        • Rigging: Skinning
        • Smooth Skinning
      • Animation >
        • Character Animation
    • Advanced >
      • Modeling >
        • Image Planes
        • Polygon Modeling >
          • Coke Can
          • Low Polygon Character
          • Character Modeling Legion the Geth
          • Character Modeling Geth Armor
          • Face Modeling
        • NURBS Modeling >
          • Intro to NURBS
          • Lofting
          • CV Curves
          • Organic Modeling
          • Autombile
      • Linda Training >
        • Advanced Modeling >
          • Modeling Basics
          • Modeling Room Objects
      • Texturing
      • Rigging >
        • Rigging with HumanIK
        • Smooth Skinning
  • Student Films
    • Advanced Student's movies
    • Beginning Student's movies
  • Links
    • BPA >
      • BPA Computer Modeling
    • The Top Six Animation Schools
    • The Top Video Game Design Schools

Lesson 3.4 - Particles and Sound Effects


Customize an explosion particle

  1. From the Course Library > Particles, drag FX_Explosion_Smoke into the hierarchy, then use the Play / Restart / Stop buttons to preview it
  2. Play around with the settings to get your particle system the way you want it
  3. Make sure to uncheck the Play on Awake setting
  4. Drag the particle onto your player to make it a child object, then position it relative to the player ​

Play the particle on collision

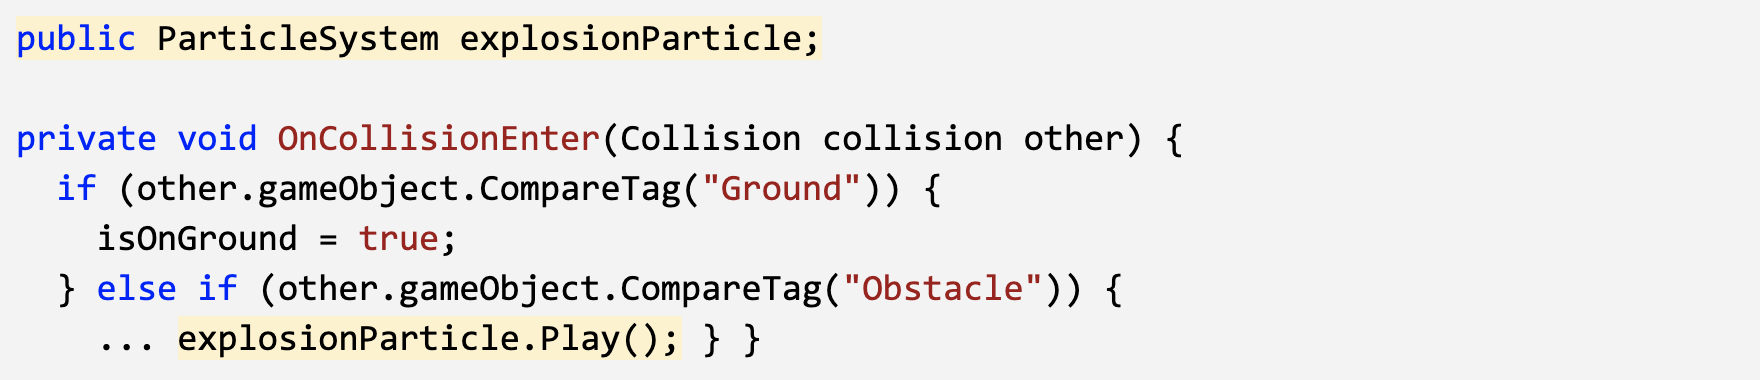
  1. In PlayerController.cs, declare a new public ParticleSystem explosionParticle;
  2. In the Inspector, assign the explosion to the explosion particle variable
  3. In the if-statement where the player collides with an obstacle, call explosionParticle.Play();, then test and tweak the particle properties
Picture

Add a dirt splatter particle

  1. Drag FX_DirtSplatter as the Player’s child object, reposition it, rotate it, and edit its settings
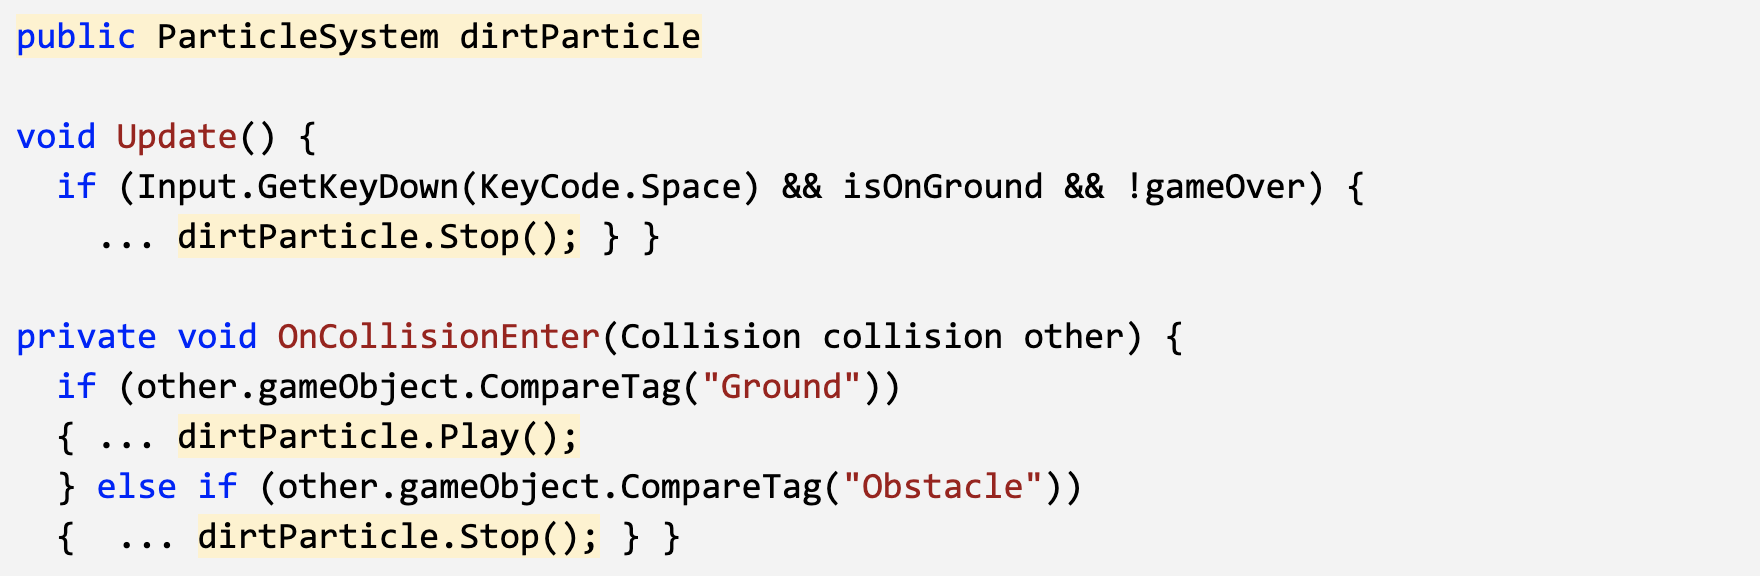
  2. Declare a new public ParticleSystem dirtParticle;, then assign it in the Inspector
  3. Add dirtParticle.Stop(); when the player jumps or collides with an obstacle
  4. Add dirtParticle.Play(); when the player lands on the ground
Picture

Add music to the camera object

​
  1. Select the Main Camera object, then Add Component > Audio Source
  2. From Course Library > Sound, drag a music clip onto the AudioClip variable in the inspector
  3. Reduce the volume so it will be easier to hear sound effects
  4. Check the Loop checkbox

Declare variables for Audio Clips

  1. In PlayerController.cs, declare a new public AudioClip jumpSound; and a new public AudioClip crashSound;
  2. From Course Library > Sound, drag a clip onto each new sound variable in the inspector

Play Audio Clips on jump and crash

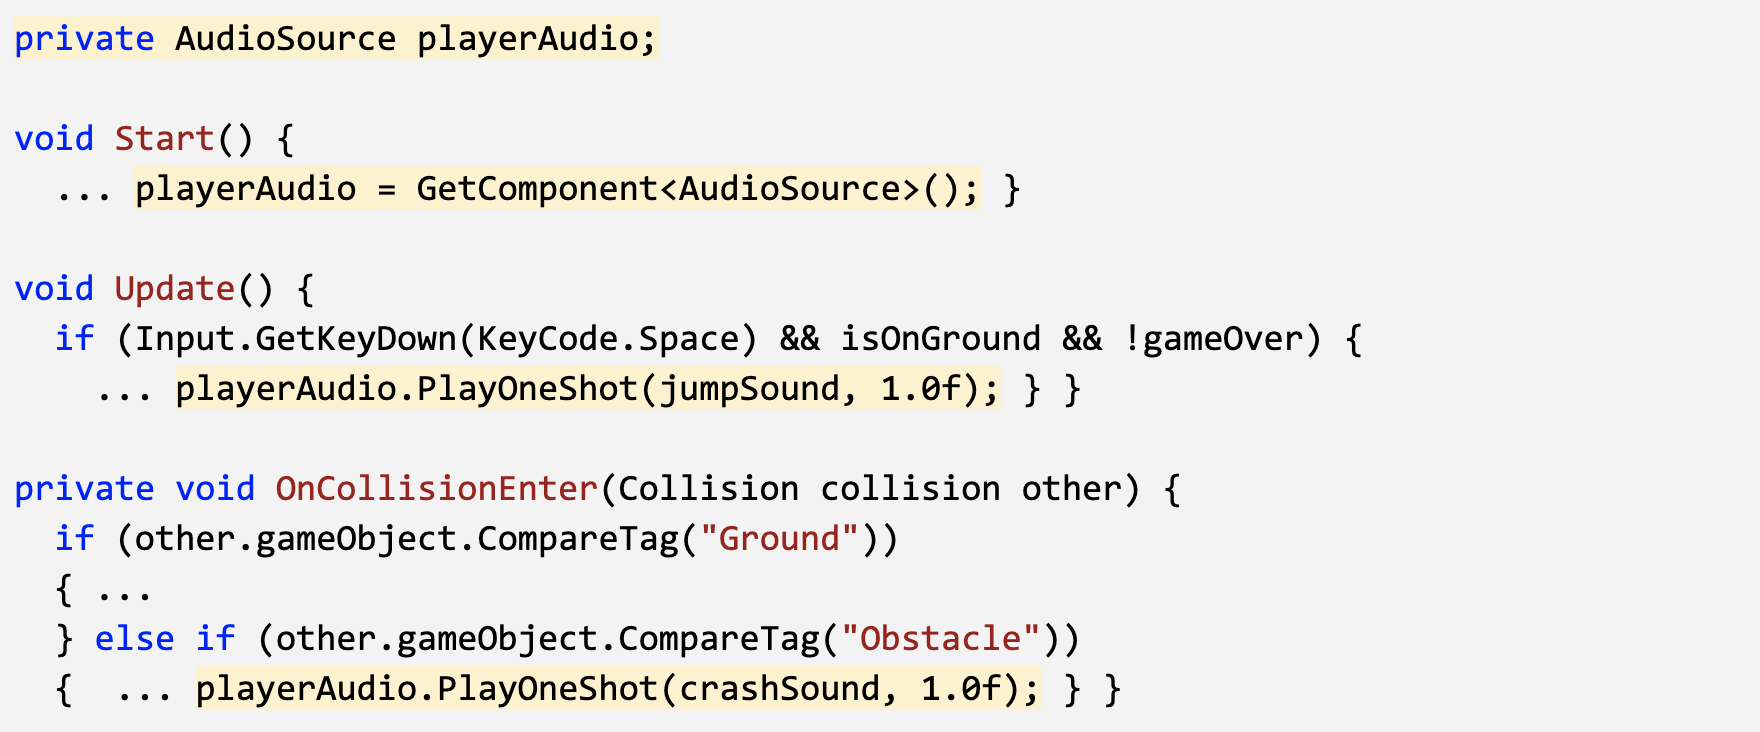
  1. Add an Audio Source component to the player
  2. Declare a new private AudioSource playerAudio; and initialize it as playerAudio = GetComponent<AudioSource>();
  3. Call playerAudio.PlayOneShot(jumpSound, 1.0f); when the character jumps
  4. Call playerAudio.PlayOneShot(crashSound, 1.0f); when the character crashes
Picture
Onto the next page
Proudly powered by Weebly