Digital FXtbook
Easy Contacts
  • Home
    • Software
    • The Author
    • Former Students Hall of Fame
    • A tribute....
    • Treasure Hunt
  • Video Game Training
    • 3d Motion Graphics >
      • Unity >
        • Unity Essentials >
          • Unity's Interface >
            • Our First Assignment
          • Modeling and Level Design >
            • The Essentials
            • The Floor is Lava Name Project
            • ProBuilder >
              • ProBuilder Pro Skater Park
              • ProBuilder Pro Skater Park 2
              • ProBuilder Image Planes
              • ProBuilder Steve Modeling
              • ProBuilder Steve Texturing
          • Programming >
            • Getting Started with Scripting
            • Default Scripting
            • Scripting a Game Object
          • Real Time Audio >
            • Adding Background Music
            • 3-d Audio effects
          • 2d Essentials >
            • 2d Game Objects
            • Objects on 2d Game Objects
        • Creative Core >
          • Introduction to Creative Core
          • Shaders and Materials
          • Lighting
          • Animation
          • VFX
          • Cameras
          • Post Processing
          • Audio
          • User Interface
          • Proto-Typing
    • C# Programming >
      • Visual Studios >
        • First Program >
          • Getting input from the User
        • Comments >
          • PsuedoCode
        • Variable Types >
          • AlphaNumeric Variables
          • Numeric Variables
          • Putting it all together
        • Operators >
          • Assignment and Arithmetic Operators >
            • Use of Parenthesis
            • When is Easter??
          • Comparison and Logical Operators >
            • Logical Data, Illogical Assignment
          • Random Class
        • Conditional Statements >
          • Number validator
          • Number tester
          • Speed Camera
        • Loops >
          • For Loops >
            • Adding Numbers
          • For Each Loops
        • Arrays >
          • Simple Arrays
          • Complex Arrays
      • Intro to Unity >
        • Unity Essentials >
          • Unity's Interface
          • The Essentials
          • Programming >
            • Getting Started with Scripting
            • Default Scripting
            • Scripting a Game Object
        • Intro to Programming 1 >
          • Player Control 1 >
            • Player Control 1.2
            • Player Control 1.3
            • Player Control 1.4
          • Player Control 2 >
            • Player Control 2.2
            • Player Control 2.3
            • Player Control 2.4
          • Player Control Challenge
        • Intro to Programming 2 >
          • Sound and Effects >
            • Sound and Effects 3.2
            • Sound and Effects 3.3
            • Sound and Effects 3.4
          • GamePlay
          • User Interface
          • Feedback and Testing
          • Next Steps
        • Intro to Programming 3 >
          • Manage Scene Flow and Data
          • Apply Object-Oriented Principles
    • Modeling and Rigging >
      • Modeling >
        • Introduction: The Temple
        • Name Text Curve
        • Character Modeling >
          • Minecraft Steve
          • Minecraft Steve UV
          • Roblox Character modeling
          • Big Daddy
          • Character Modeling Legion the Geth
          • Character Modeling Geth Armor
        • Weapons >
          • Minecraft Tools and Weapons
          • Minecraft Movie Pickaxe
          • Minecraft Movie Sword
          • Thor's Hammer
          • Hammer
          • LOL Sword
          • Sword of Light
          • Buzz Axe
          • Weapon
      • Rigging >
        • Intro to Rigging
        • Controls
        • Rigging Basics
        • Rigging Creating Skeletons
        • Rigging: Body Controls
        • Rigging: Hands
        • Rigging: Skinning
        • Smooth Skinning
      • Animation >
        • Character Animation
    • Advanced >
      • Modeling >
        • Image Planes
        • Polygon Modeling >
          • Coke Can
          • Low Polygon Character
          • Character Modeling Legion the Geth
          • Character Modeling Geth Armor
          • Face Modeling
        • NURBS Modeling >
          • Intro to NURBS
          • Lofting
          • CV Curves
          • Organic Modeling
          • Autombile
      • Linda Training >
        • Advanced Modeling >
          • Modeling Basics
          • Modeling Room Objects
      • Texturing
      • Rigging >
        • Rigging with HumanIK
        • Smooth Skinning
  • Student Films
    • Advanced Student's movies
    • Beginning Student's movies
  • Links
    • BPA >
      • BPA Computer Modeling
    • The Top Six Animation Schools
    • The Top Video Game Design Schools

Lesson 1.4 - Step into the Driver's Seat

In this lesson, we need to hit the road and gain control of the vehicle. In order to do so, we need to detect when the player is pressing the arrow keys, then accelerate and turn the vehicle based on that input. Using new methods, Vectors, and variables, you will allow the vehicle to move forwards or backwards and turn left to right.

Allow the vehicle to move left/right

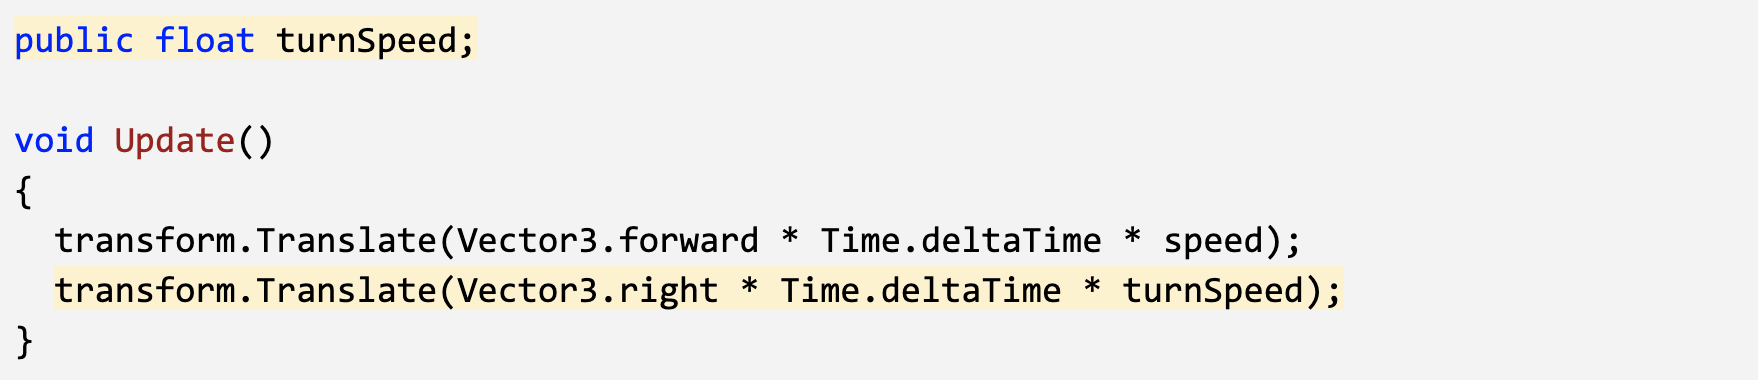
  1. At the top of PlayerController.cs, add a public float turnSpeed; variable
  2. In Update(), add transform.Translate(Vector3.right * Time.deltaTime * turnSpeed);
  3. Run your game and use the turnSpeed variable slider to move the vehicle left and right
Picture

Base left/right movement on input

  1. From the top menu, click Edit > Project Settings, select Input Manager in the left sidebar, then expand the Axes fold-out to explore the inputs
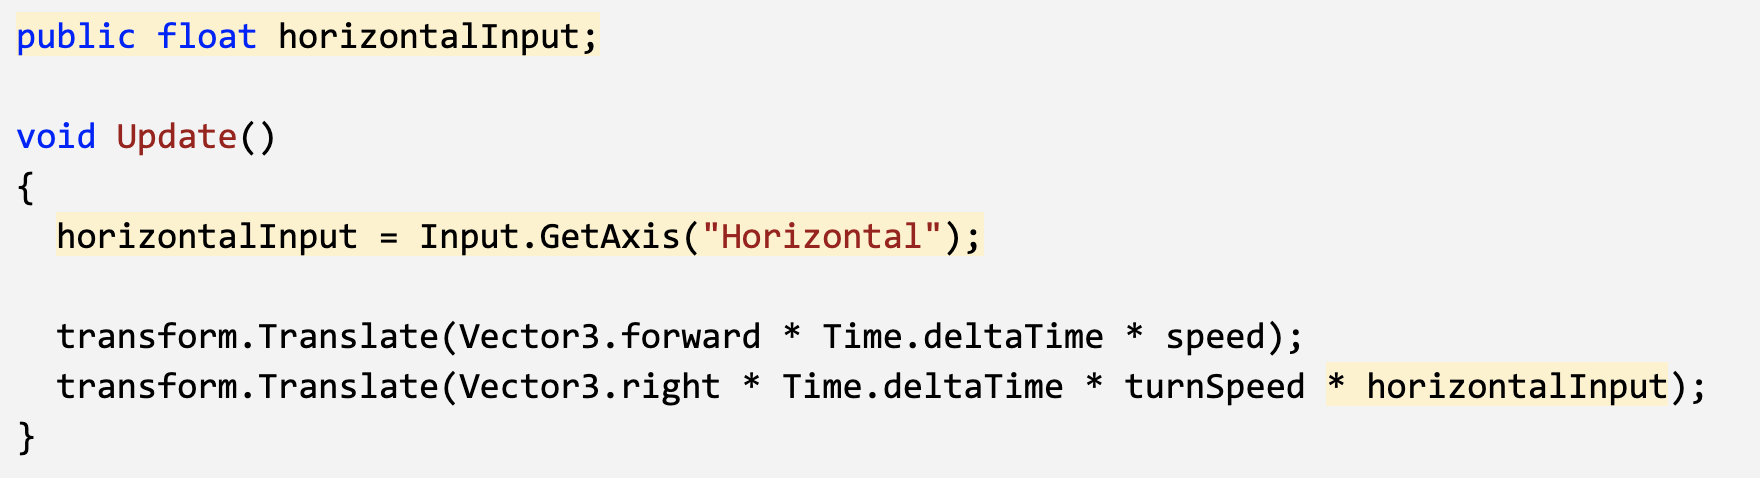
  2. In PlayerController.cs, add a new public float horizontalInput variable
  3. In Update, assign horizontalInput = Input.GetAxis("Horizontal");, then test to see it in inspector
  4. Add the horizontalInput variable to your left/right Translate method to gain control of the vehicle
  5. In the Inspector, edit the turnSpeed and speed variables to tweak the feel

​
Picture

Take control of the vehicle speed

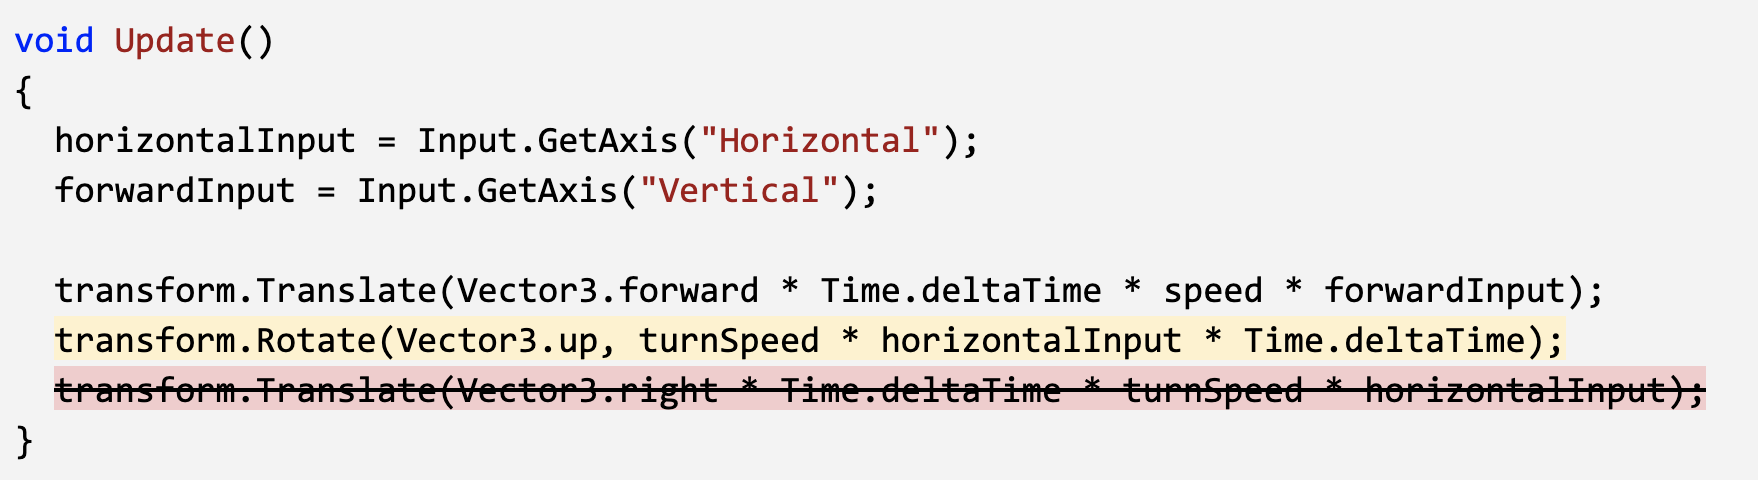
  1. Declare a new public forwardInput variable
  2. In Update, assign forwardInput = Input.GetAxis("Vertical");
  3. Add the forwardInput variable to the forward Translate method, then test ​

​
Picture

Make vehicle rotate instead of slide

  1. Go to Course Library > Obstacles and drag an obstacle directly into the Scene view
  2. In the Inspector for your obstacle, in the top-right of the Transform component, click the more options button > Reset Position Note: The more options button may appear as three vertical dots or a gear icon, depending on your version of Unity
  3. In the Inspector, change the XYZ Location to x=0, y=0, z=25
  4. In the Hierarchy, Right-click > Rename your two objects as “Vehicle” and “Obstacle”
Picture

Clean your code and hierarchy

  1. In the hierarchy, Right-click > Create Empty and rename it “Obstacles”, then drag all the obstacles into it
  2. Initialize variables with values in PlayerController, then make all variables private (except for the player variables)
  3. Use // to add comments to each section of code
Picture
Onto the next page
Proudly powered by Weebly