Digital FXtbook
Easy Contacts
  • Home
    • Software
    • The Author
    • Former Students Hall of Fame
    • A tribute....
    • Treasure Hunt
  • Video Game Training
    • 3d Motion Graphics >
      • Unity >
        • Unity Essentials >
          • Unity's Interface >
            • Our First Assignment
          • Modeling and Level Design >
            • The Essentials
            • The Floor is Lava Name Project
            • ProBuilder >
              • ProBuilder Image Planes
              • ProBuilder Steve Modeling
              • ProBuilder Steve Texturing
          • Programming >
            • Getting Started with Scripting
            • Default Scripting
            • Scripting a Game Object
          • Real Time Audio >
            • Adding Background Music
            • 3-d Audio effects
          • 2d Essentials >
            • 2d Game Objects
            • Objects on 2d Game Objects
        • Creative Core >
          • Introduction to Creative Core
          • Shaders and Materials
          • Lighting
          • Animation
          • VFX
          • Cameras
          • Post Processing
          • Audio
          • User Interface
          • Proto-Typing
      • Maya
    • C# Programming >
      • Visual Studios >
        • First Program >
          • Getting input from the User
        • Comments >
          • PsuedoCode
        • Variable Types >
          • AlphaNumeric Variables
          • Numeric Variables
          • Putting it all together
        • Operators >
          • Assignment and Arithmetic Operators >
            • Use of Parenthesis
            • When is Easter??
          • Comparison and Logical Operators >
            • Logical Data, Illogical Assignment
          • Random Class
        • Conditional Statements >
          • Number validator
          • Number tester
          • Speed Camera
        • Loops >
          • For Loops >
            • Adding Numbers
          • For Each Loops
        • Arrays >
          • Simple Arrays
          • Complex Arrays
      • Intro to Unity >
        • Unity Essentials >
          • Unity's Interface
          • The Essentials
          • Programming >
            • Getting Started with Scripting
            • Default Scripting
            • Scripting a Game Object
        • Intro to Programming 1 >
          • Player Control 1 >
            • Player Control 1.2
            • Player Control 1.3
            • Player Control 1.4
          • Player Control 2 >
            • Player Control 2.2
            • Player Control 2.3
            • Player Control 2.4
          • Player Control Challenge
        • Intro to Programming 2 >
          • Sound and Effects >
            • Sound and Effects 3.2
            • Sound and Effects 3.3
            • Sound and Effects 3.4
          • GamePlay
          • User Interface
          • Feedback and Testing
          • Next Steps
        • Intro to Programming 3 >
          • Manage Scene Flow and Data
          • Apply Object-Oriented Principles
    • Modeling and Rigging >
      • Maya >
        • Modeling >
          • Introduction: The Temple
          • Name Text Curve
          • Character Modeling >
            • Minecraft Steve
            • Minecraft Tools and Weapons
            • Roblox Character modeling
            • Big Daddy
            • Demon School Iruma-kun
            • Character Modeling Legion the Geth
            • Character Modeling Geth Armor
          • Weapons >
            • Thor's Hammer
            • Hammer
            • LOL Sword
            • Sword of Light
            • Buzz Axe
            • Weapon
        • Animation >
          • Character Animation
        • Rigging >
          • Intro to Rigging
          • Controls
          • Rigging Basics
          • Rigging Creating Skeletons
          • Rigging: Body Controls
          • Rigging: Hands
          • Rigging: Skinning
          • Rigging with HumanIK
          • Smooth Skinning
      • Substance Painter
      • Advanced >
        • Modeling >
          • Image Planes
          • Polygon Modeling >
            • Coke Can
            • Low Polygon Character
            • Character Modeling Legion the Geth
            • Character Modeling Geth Armor
            • Face Modeling
          • NURBS Modeling >
            • Intro to NURBS
            • Lofting
            • CV Curves
            • Organic Modeling
            • Autombile
        • Linda Training >
          • Advanced Modeling >
            • Modeling Basics
            • Modeling Room Objects
        • Texturing
        • Rigging >
          • Rigging with HumanIK
          • Smooth Skinning
    • 2d >
      • Toon Boom Harmony >
        • Toon Boom Start Series Set #1
        • Toon Boom Start Series Set #2
        • Toon Boom Start Series Set #3
      • StoryBoard Pro >
        • Storyboard Pro Page 1
        • Storyboard Pro Page 2
        • Storyboard Pro Page 3
        • Storyboard Pro Page 4
  • Computer Animation
    • AutoDesk
    • Introduction: The Temple
    • Creating a Film >
      • Scriptwriting and Planning
      • StoryBoarding
      • Story Reels
    • Modeling >
      • The Nail
      • First Freestyle Lesson >
        • Cup and Straw
        • Garbage Can
      • Fence
      • Hammer
      • House
      • Environment Bubble
    • Animation >
      • Beginning Animation
      • Animation - Walk Cycle
      • Facial Animation
    • Rendering >
      • Arnold Rendering
    • Editing film >
      • Credits
      • Video Editing
    • Characters
  • Student Films
    • Advanced Student's movies
    • Beginning Student's movies
  • Links
    • BPA
    • The Top Six Animation Schools
    • The Top Video Game Design Schools

Lesson 2.2 - Food Flight

In this lesson, you will allow the player to launch the projectile through the scene. First you will write a new script to send the projectile forwards. Next you will store the projectile along with all of its scripts and properties using an important new concept in Unity called Prefabs. The player will be able to launch the projectile prefab with a tap of the spacebar. Finally, you will add boundaries to the scene, removing any objects that leave the screen.

​Make the projectile fly forwards

  1. Create a new “MoveForward” script, attach it to the food object, then open it
  2. Declare a new public float speed variable;
  3. In Update(), add transform.Translate(Vector3.forward * Time.deltaTime * speed);, then save
  4. In the Inspector, set the projectile’s speed variable, then test
Picture

​Make the projectile into a prefab

  1. Create a new “Prefabs” folder, drag your food into it, and choose Original Prefab
  2. In PlayerController.cs, declare a new public GameObject projectilePrefab; variable
  3. Select the Player in the hierarchy, then drag the object from your Prefabs folder onto the new Projectile Prefab box in the inspector
  4. Try dragging the projectile into the scene at runtime to make sure they fly

​Test for spacebar press

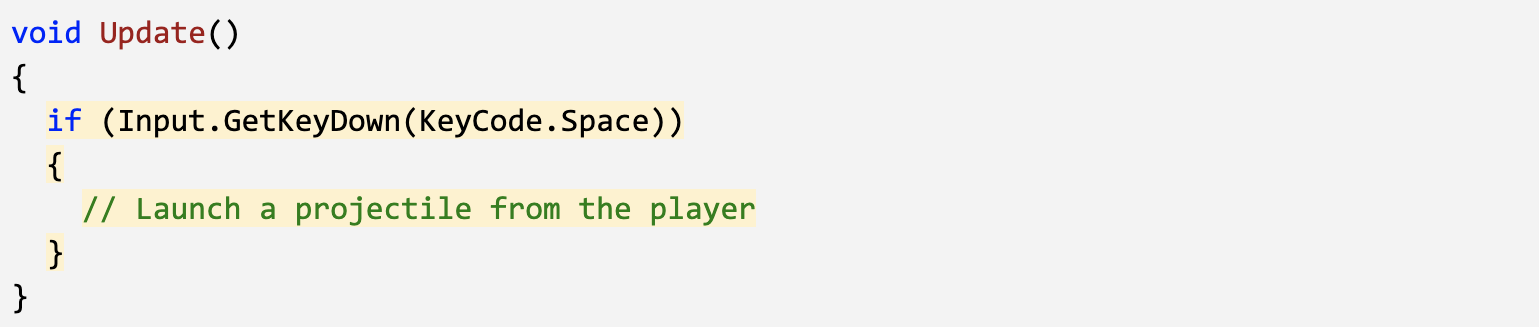
  1. In PlayerController.cs, in Update(), add an if-statement checking for a spacebar press: if (Input.GetKeyDown(KeyCode.Space)) {
  2. Inside the if-statement, add a comment saying that you should // Launch a projectile from the player
Picture

  1. Inside the if-statement, use the Instantiate method to spawn a projectile at the player’s location with the prefab’s rotation
Picture

​Make animals into prefabs

  1. Rotate all animals on the Y axis by 180 degrees to face down
  2. Select all three animals in the hierarchy and Add Component > Move Forward
  3. Edit their speed values and test to see how it looks
  4. Drag all three animals into the Prefabs folder, choosing “Original Prefab”
  5. Test by dragging prefabs into scene view during gameplay

​Destroy projectiles offscreen

  1. Create “DestroyOutOfBounds” script and apply it to the projectile
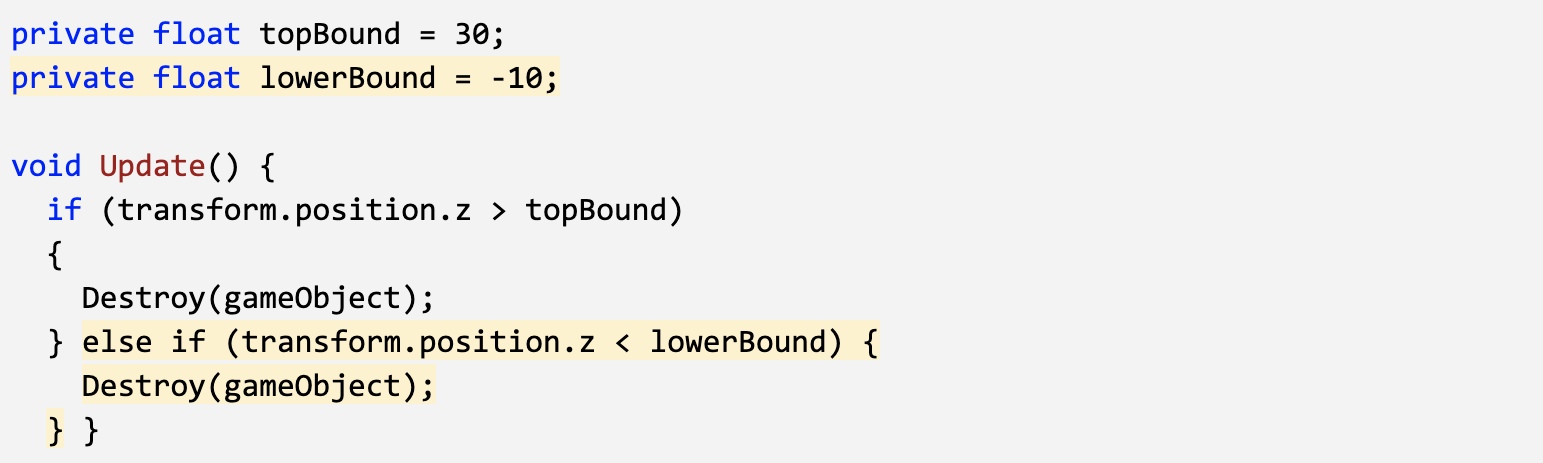
  2. Add a new private float topBound variable and initialize it = 30;
  3. Write code to destroy if out of top bounds if (transform.position.z > topBound) { Destroy(gameObject); }
  4. In the Inspector Overrides drop-down, click Apply all to apply it to prefab
Picture

​Destroy animals offscreen

  1. Create else-if statement to check if objects are beneath lowerBound: else if (transform.position.z < lowerBound)
  2. Apply the script to all of the animals, then Override the prefabs
Picture

Onto the next page
Proudly powered by Weebly