Digital FXtbook
Easy Contacts
  • Home
    • Software
    • The Author
    • Former Students Hall of Fame
    • A tribute....
    • Treasure Hunt
  • Video Game Training
    • 3d Motion Graphics >
      • Unity >
        • Unity Essentials >
          • Unity's Interface >
            • Our First Assignment
          • Modeling and Level Design >
            • The Essentials
            • The Floor is Lava Name Project
            • ProBuilder >
              • ProBuilder Image Planes
              • ProBuilder Steve Modeling
              • ProBuilder Steve Texturing
          • Programming >
            • Getting Started with Scripting
            • Default Scripting
            • Scripting a Game Object
          • Real Time Audio >
            • Adding Background Music
            • 3-d Audio effects
          • 2d Essentials >
            • 2d Game Objects
            • Objects on 2d Game Objects
        • Creative Core >
          • Introduction to Creative Core
          • Shaders and Materials
          • Lighting
          • Animation
          • VFX
          • Cameras
          • Post Processing
          • Audio
          • User Interface
          • Proto-Typing
    • C# Programming >
      • Visual Studios >
        • First Program >
          • Getting input from the User
        • Comments >
          • PsuedoCode
        • Variable Types >
          • AlphaNumeric Variables
          • Numeric Variables
          • Putting it all together
        • Operators >
          • Assignment and Arithmetic Operators >
            • Use of Parenthesis
            • When is Easter??
          • Comparison and Logical Operators >
            • Logical Data, Illogical Assignment
          • Random Class
        • Conditional Statements >
          • Number validator
          • Number tester
          • Speed Camera
        • Loops >
          • For Loops >
            • Adding Numbers
          • For Each Loops
        • Arrays >
          • Simple Arrays
          • Complex Arrays
      • Intro to Unity >
        • Unity Essentials >
          • Unity's Interface
          • The Essentials
          • Programming >
            • Getting Started with Scripting
            • Default Scripting
            • Scripting a Game Object
        • Intro to Programming 1 >
          • Player Control 1 >
            • Player Control 1.2
            • Player Control 1.3
            • Player Control 1.4
          • Player Control 2 >
            • Player Control 2.2
            • Player Control 2.3
            • Player Control 2.4
          • Player Control Challenge
        • Intro to Programming 2 >
          • Sound and Effects >
            • Sound and Effects 3.2
            • Sound and Effects 3.3
            • Sound and Effects 3.4
          • GamePlay
          • User Interface
          • Feedback and Testing
          • Next Steps
        • Intro to Programming 3 >
          • Manage Scene Flow and Data
          • Apply Object-Oriented Principles
    • Modeling and Rigging >
      • Modeling >
        • Introduction: The Temple
        • Name Text Curve
        • Character Modeling >
          • Minecraft Steve
          • Minecraft Steve UV
          • Roblox Character modeling
          • Big Daddy
          • Character Modeling Legion the Geth
          • Character Modeling Geth Armor
        • Weapons >
          • Minecraft Tools and Weapons
          • Minecraft Movie Pickaxe
          • Minecraft Movie Sword
          • Thor's Hammer
          • Hammer
          • LOL Sword
          • Sword of Light
          • Buzz Axe
          • Weapon
      • Rigging >
        • Intro to Rigging
        • Controls
        • Rigging Basics
        • Rigging Creating Skeletons
        • Rigging: Body Controls
        • Rigging: Hands
        • Rigging: Skinning
        • Smooth Skinning
      • Animation >
        • Character Animation
    • Advanced >
      • Modeling >
        • Image Planes
        • Polygon Modeling >
          • Coke Can
          • Low Polygon Character
          • Character Modeling Legion the Geth
          • Character Modeling Geth Armor
          • Face Modeling
        • NURBS Modeling >
          • Intro to NURBS
          • Lofting
          • CV Curves
          • Organic Modeling
          • Autombile
      • Linda Training >
        • Advanced Modeling >
          • Modeling Basics
          • Modeling Room Objects
      • Texturing
      • Rigging >
        • Rigging with HumanIK
        • Smooth Skinning
  • Student Films
    • Advanced Student's movies
    • Beginning Student's movies
  • Links
    • BPA >
      • BPA Computer Modeling
    • The Top Six Animation Schools
    • The Top Video Game Design Schools

Lesson 2.3 - Random Animal Stampede


​Create a spawn manager

  1. In the Hierarchy, create an Empty object called “SpawnManager”
  2. Create a new script called “SpawnManager”, attach it to the Spawn Manager, and open it
  3. Declare new public GameObject[ ] animalPrefabs;
  4. In the Inspector, change the Array size to match your animal count, then assign your animals by dragging them from the Project window into the empty slots Note: Make sure you drag them from the Project window; not the Hierarchy! If you're going to spawn objects, you need to make sure you're using Prefabs, which are stored in the Project window.

​Spawn an animal if S is pressed

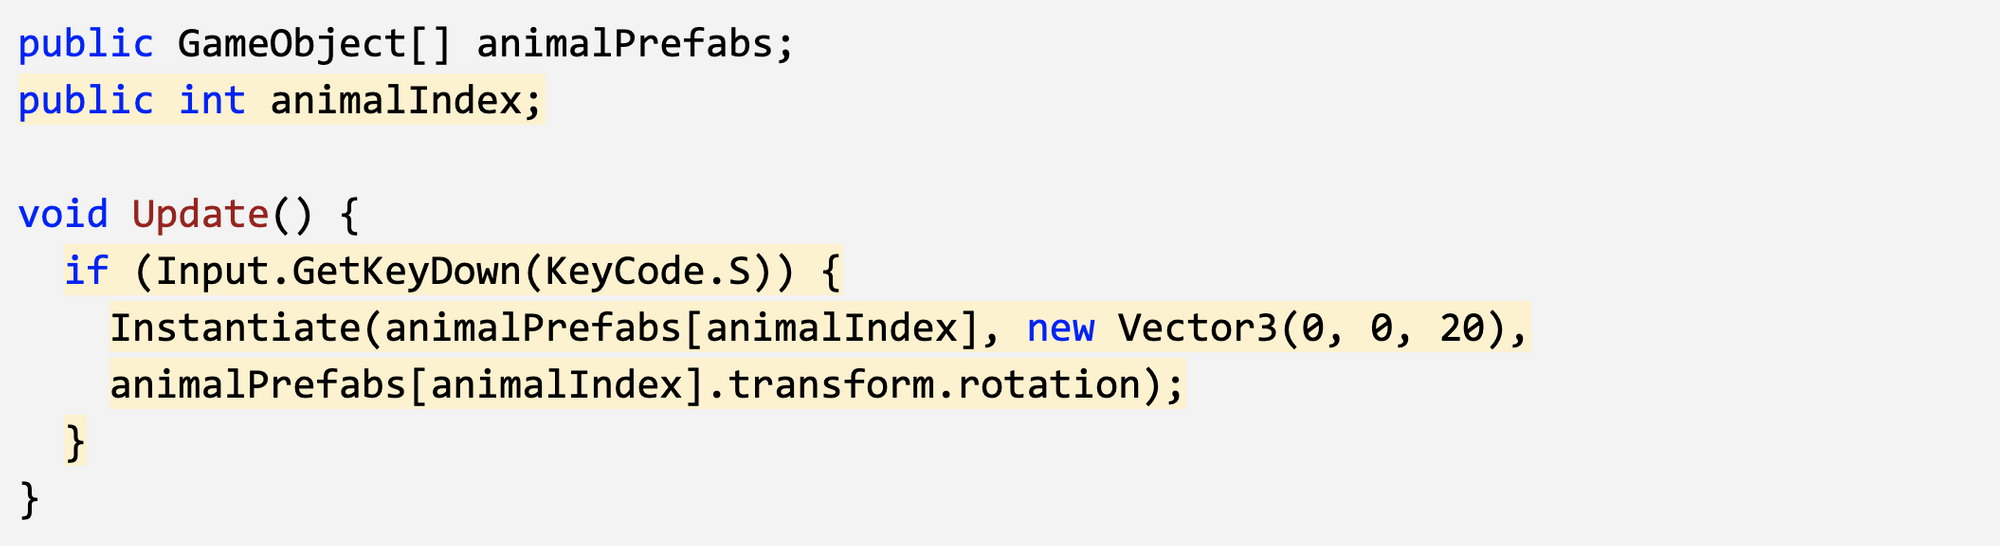
  1. In Update(), write an if-then statement to instantiate a new animal prefab at the top of the screen if S is pressed
  2. Declare a new public int animalIndex and incorporate it in the Instantiate call, then test editing the value in the Inspector
Picture

​Spawn random animals from array

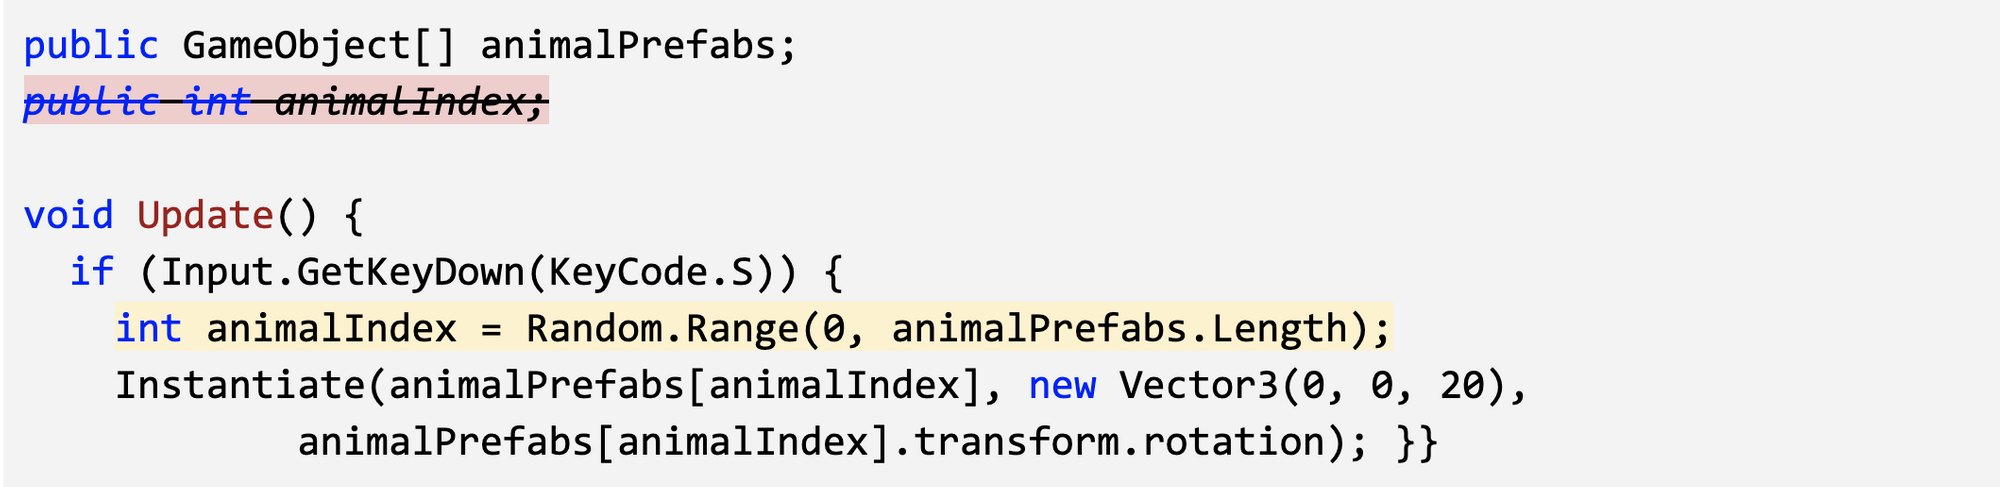
  1. In the if-statement checking if S is pressed, generate a random int animalIndex between 0 and the length of the array
  2. Remove the global animalIndex variable, since it is only needed locally in the if-statement ​
Picture

​Randomize the spawn location

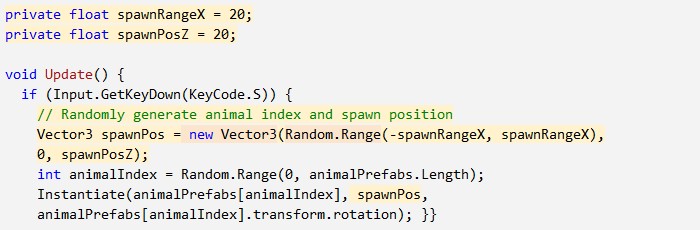
  1. Replace the X value for the Vector3 with Random.Range(-20, 20), then test
  2. Within the if-statement, make a new local Vector3 spawnPos variable
  3. At the top of the class, create private float variables for spawnRangeX and spawnPosZ
Picture

​Change the perspective of the camera

  1. Toggle between Perspective and Isometric view in Scene view to appreciate the difference
  2. Select the camera and change the Projection from “Perspective” to “Orthographic”
Onto the next page
Proudly powered by Weebly