Digital FXtbook
Easy Contacts
  • Home
    • Software
    • The Author
    • Former Students Hall of Fame
    • A tribute....
  • 3d Training
    • Game Design >
      • Treasure Hunt
      • Unity >
        • Unity's Interface >
          • Our First Assignment
        • Unity Essentials >
          • 3d Gaming Essentials >
            • The Floor is Lava Name Project
          • Introduction to Scripting >
            • Getting Started with Scripting
            • Default Scripting
            • Scripting a Game Object
          • Real Time Audio >
            • Adding Background Music
            • 3-d Audio effects
          • 2d Essentials >
            • 2d Game Objects
            • Objects on 2d Game Objects
        • Creative Core >
          • Introduction to Creative Core
          • Shaders and Materials
          • Lighting
          • Animation
          • VFX
          • Cameras
          • Post Processing
          • Audio
          • User Interface
          • Proto-Typing
      • Maya >
        • Modeling >
          • Introduction: The Temple
          • Name Text Curve
          • Minecraft Steve
          • Minecraft Tools and Weapons
          • Roblox Character modeling
          • Garbage Can
          • Hammer
          • Sword of Light
          • Buzz Axe
          • Halo 1 Blood Gulch Base
          • Hammer
          • Sword
          • Character Modeling Big Daddy
          • Shield
          • The OM6G
          • Weapon
          • Character Modeling Legion the Geth
          • Character Modeling Geth Armor
        • Animation >
          • Character Animation
        • Rigging >
          • Rigging with HumanIK
          • Characterizing and MoCap
          • Integration with Unity
    • Computer Animation >
      • AutoDesk
      • Introduction: The Temple
      • Creating a Film >
        • Scriptwriting and Planning
        • StoryBoarding
        • Story Reels
      • Modeling >
        • The Nail
        • First Freestyle Lesson >
          • Cup and Straw
          • Garbage Can
        • Fence
        • Hammer
        • House
        • Environment Bubble
      • Animation >
        • Beginning Animation
        • Animation - Walk Cycle
        • Facial Animation
      • Rendering >
        • Arnold Rendering
      • Editing film >
        • Credits
        • Video Editing
      • Characters
    • Advanced Modeling and Rigging >
      • Unity VR Development >
        • VR Setup
        • VR 1st Project
      • Modeling and Rigging >
        • Linda Training >
          • Advanced Modeling >
            • Modeling Basics
            • Modeling Room Objects
          • Rigging >
            • Rigging Basics
            • Rigging Creating Skeletons
            • Rigging: Body Controls
            • Rigging: Hands
            • Rigging: Skinning
        • Modeling >
          • Image Planes
          • Polygon Modeling >
            • Coke Can
            • Low Polygon Character
            • Character Modeling Legion the Geth
            • Character Modeling Geth Armor
            • Face Modeling
          • NURBS Modeling >
            • Intro to NURBS
            • Lofting
            • CV Curves
            • Organic Modeling
            • Autombile
        • Texturing
        • Rigging >
          • Rigging with HumanIK
          • Smooth Skinning
        • Motion Capture
        • Blender
      • 3d Animation >
        • Linda Training >
          • Animation - Fundamentals
          • Animation - Next Steps
          • Animation - Pose to Pose
          • Animation - Facial Animation
          • Animation - Lip and Body Animation
        • Arnold Rendering
        • Reference Videos
        • Beginning Animation
        • Characters
  • Coding
    • Unity Coding >
      • Intro to Programming 1 >
        • Player Control 1 >
          • Player Control 1.2
          • Player Control 1.3
          • Player Control 1.4
        • Player Control 2 >
          • Player Control 2.2
          • Player Control 2.3
          • Player Control 2.4
        • Player Control Challenge
      • Intro to Programming 2 >
        • Sound and Effects >
          • Sound and Effects 3.2
          • Sound and Effects 3.3
          • Sound and Effects 3.4
        • GamePlay
        • User Interface
        • Feedback and Testing
        • Next Steps
      • Intro to Programming 3 >
        • Manage Scene Flow and Data
        • Apply Object-Oriented Principles
    • C# Game Scripting >
      • First Program >
        • Getting input from the User
      • Comments >
        • PsuedoCode
      • Variable Types >
        • AlphaNumeric Variables
        • Numeric Variables
        • Putting it all together
      • Operators >
        • Assignment and Arithmetic Operators >
          • Use of Parenthesis
          • Algebra in code and assundry CHAOS
        • Comparison and Logical Operators >
          • Logical Data, Illogical Assignment
        • Operator Assignments >
          • Floats Conversion from Metric to English
          • When is Easter??
        • Random Class
      • Arrays >
        • Simple Arrays
        • Complex Arrays
      • Conditional Statements >
        • Number validator
        • Number tester
        • Speed Camera
      • Loops >
        • For Loops >
          • Adding Numbers
        • For Each Loops
      • Try and Catch
      • Casting
      • Object Oriented Programming
      • U to Me >
        • Introduction Unity Lesson
        • Number Wizard Game #1
        • Second Unity Game: Text Adventure
        • Number Wizard Game GUI >
          • Block Breaker >
            • Block Breaker Game #1
            • Block Breaker Game #2
            • Block Breaker Game #3
            • Block Breaker Game #4
  • Broadcasting
    • Treasure Hunt
    • Audio >
      • Microphones >
        • Construction
        • Patterns
        • Peripherals
      • Mixers >
        • Types and Styles
        • Audio Computer Interfaces
        • Layout and Interface
        • Peripherals
        • Cords
      • PodCasting >
        • Setup and Operation
        • PodCasting Assignment
      • Boom Operating >
        • Equipment
        • Setup and Operation
    • Video >
      • Cameras >
        • Construction
        • Layout and Interface
        • Types and Styles >
          • Photography
          • Video
          • PTZ and Interfaces
      • Peripherals >
        • Power
        • Cords
        • Stabilizers >
          • Tripods and Chest Rigs
          • Gimbals and Sliders
        • Transmitting Wirelessly
      • Live Broadcasting >
        • Computer Interface >
          • Audio
          • Video
        • Streaming >
          • OBS
          • StreamYards
          • Software
      • Pre-Recorded >
        • Editing >
          • Premier >
            • Chapter 1
            • Chapter 2
            • Chapter 3
            • Editing A-Roll
            • Chapter 4
            • Editing B-Roll
            • Chapter 5
            • Chapter 6
            • Chapter 7
            • Chapter 8
            • Chapter 9
            • Chapter 10
            • Chapter 11
            • Chapter 12
    • Journalism >
      • Story Telling
      • Script Writing
  • Student Films
    • Advanced Student's movies
    • Beginning Student's movies
  • Links
    • BPA >
      • Futuristic Character >
        • Design and Concept
    • The Top Six Animation Schools
    • The Top Video Game Design Schools

Lesson 3.2 - Make the World Whiz By


Create a script to repeat background

  1. Create a new script called RepeatBackground.cs and attach it to the Background Object

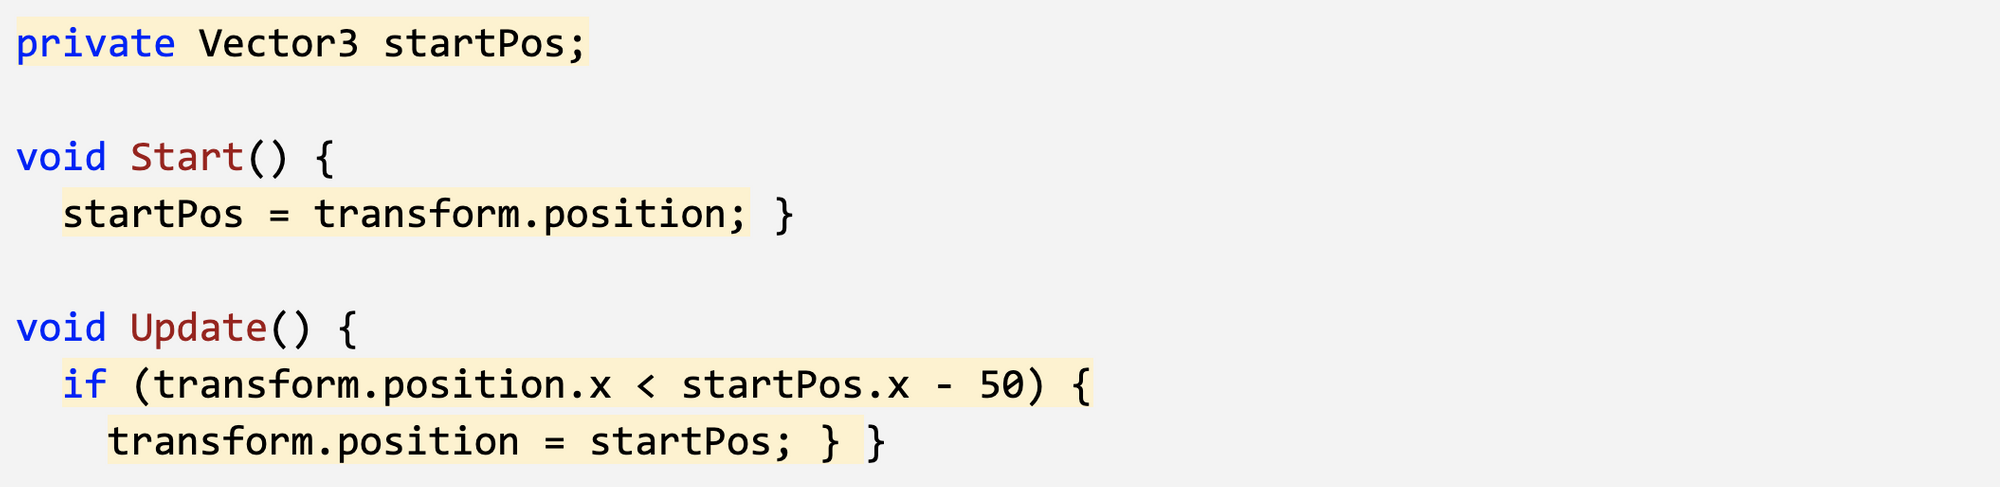
Reset position of background

  1. Declare a new variable private Vector3 startPos;
  2. In Start(), set the startPos variable to its actual starting position by assigning it = transform.position;
  3. In Update(), write an if-statement to reset position if it moves a certain distance
Picture

Fix background repeat with collider

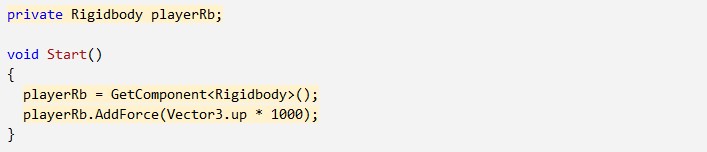
  1. In PlayerController.cs, declare a new private Rigidbody playerRb; variable
  2. In Start(), initialize playerRb = GetComponent<Rigidbody>();
  3. In Start(), use the AddForce method to make the player jump at the start of the game
Picture

​Make player jump if spacebar pressed

​
  1. Add a Box Collider component to the Background
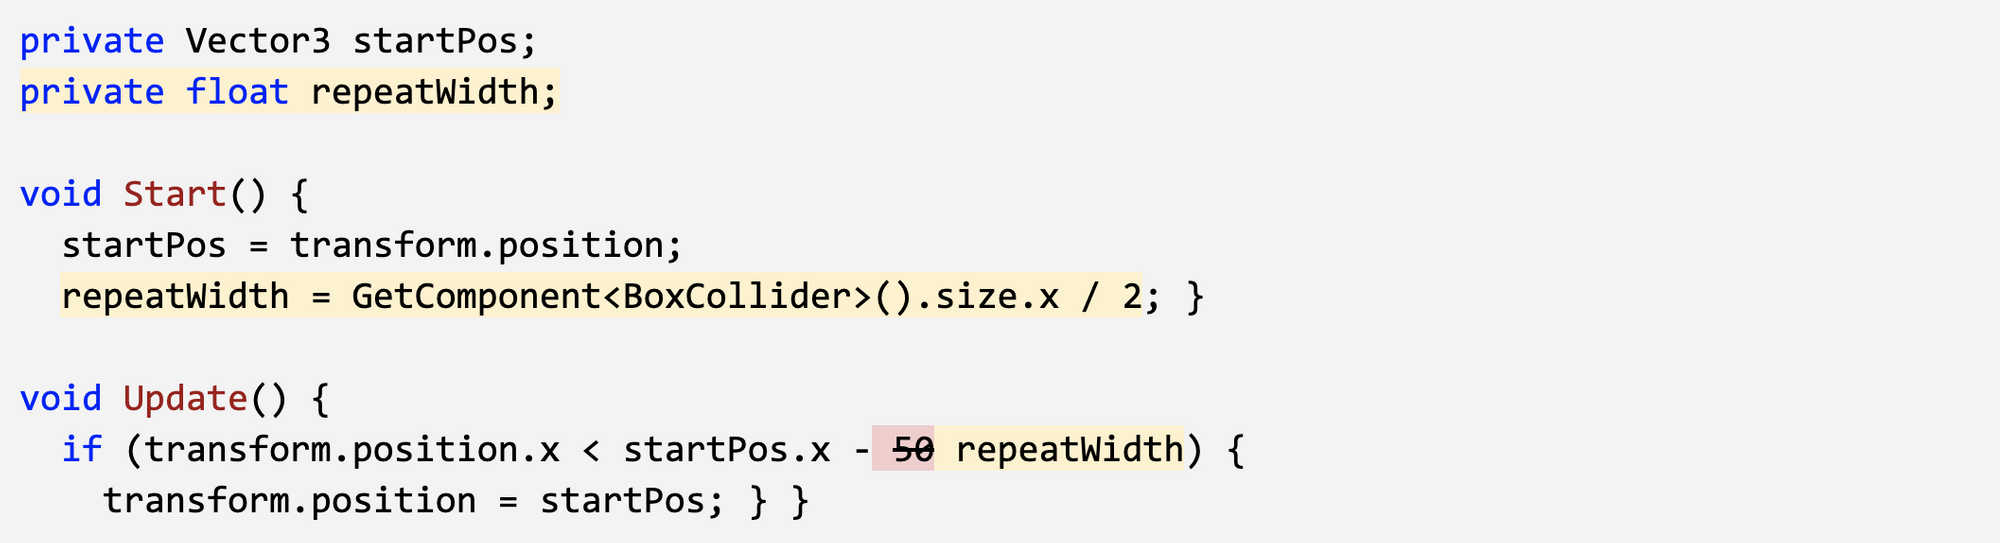
  2. Declare a new private float repeatWidth variable
  3. In Start(), get the width of the box collider, divided by 2
  4. Incorporate the repeatWidth variable into the repeat function
Picture

Add a new game over trigger

  1. In the inspector, add a “Ground” tag to the Ground and an “Obstacle” tag to the Obstacle prefab
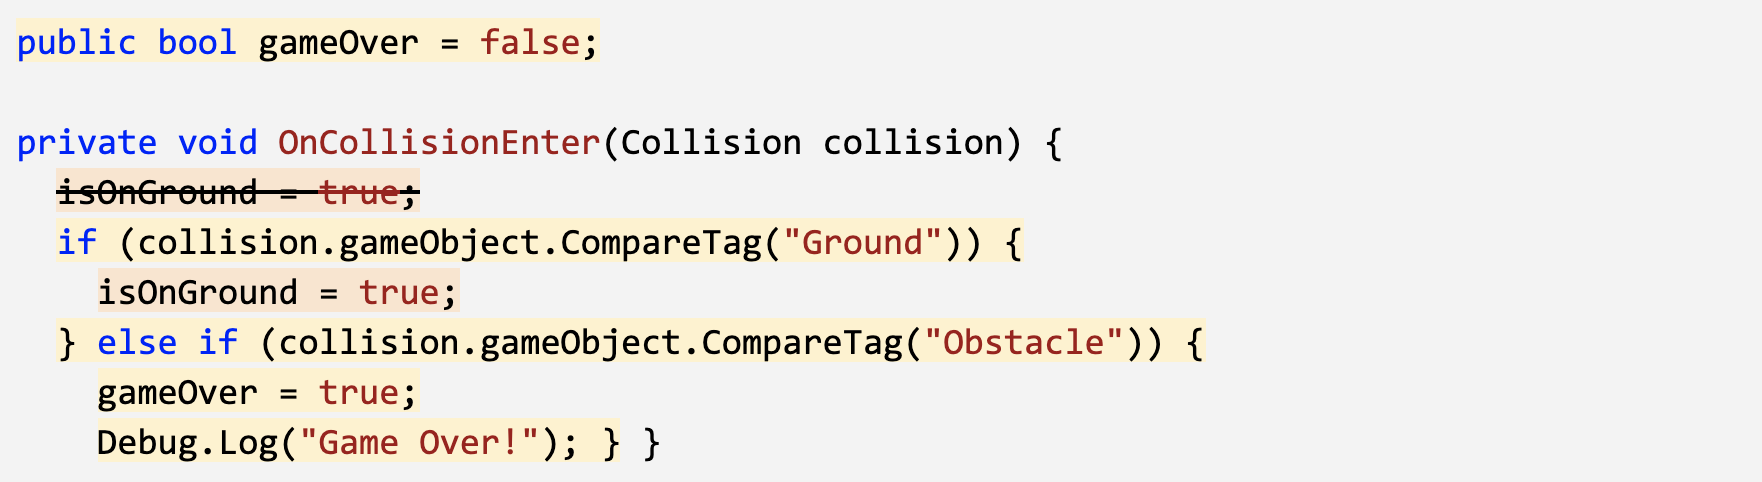
  2. In PlayerController, declare a new public bool gameOver;
  3. In OnCollisionEnter, add the if-else statement to test if player collided with the “Ground” or an “Obstacle”
  4. If they collided with the “Ground”, set isOnGround = true, and if they collide with an “Obstacle”, set gameOver = true
Picture

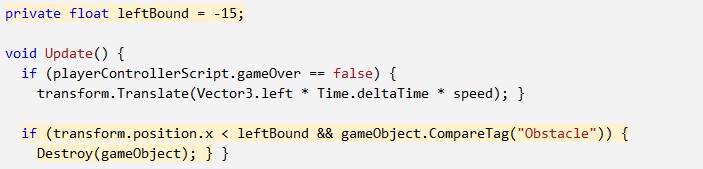
Stop MoveLeft on gameOver

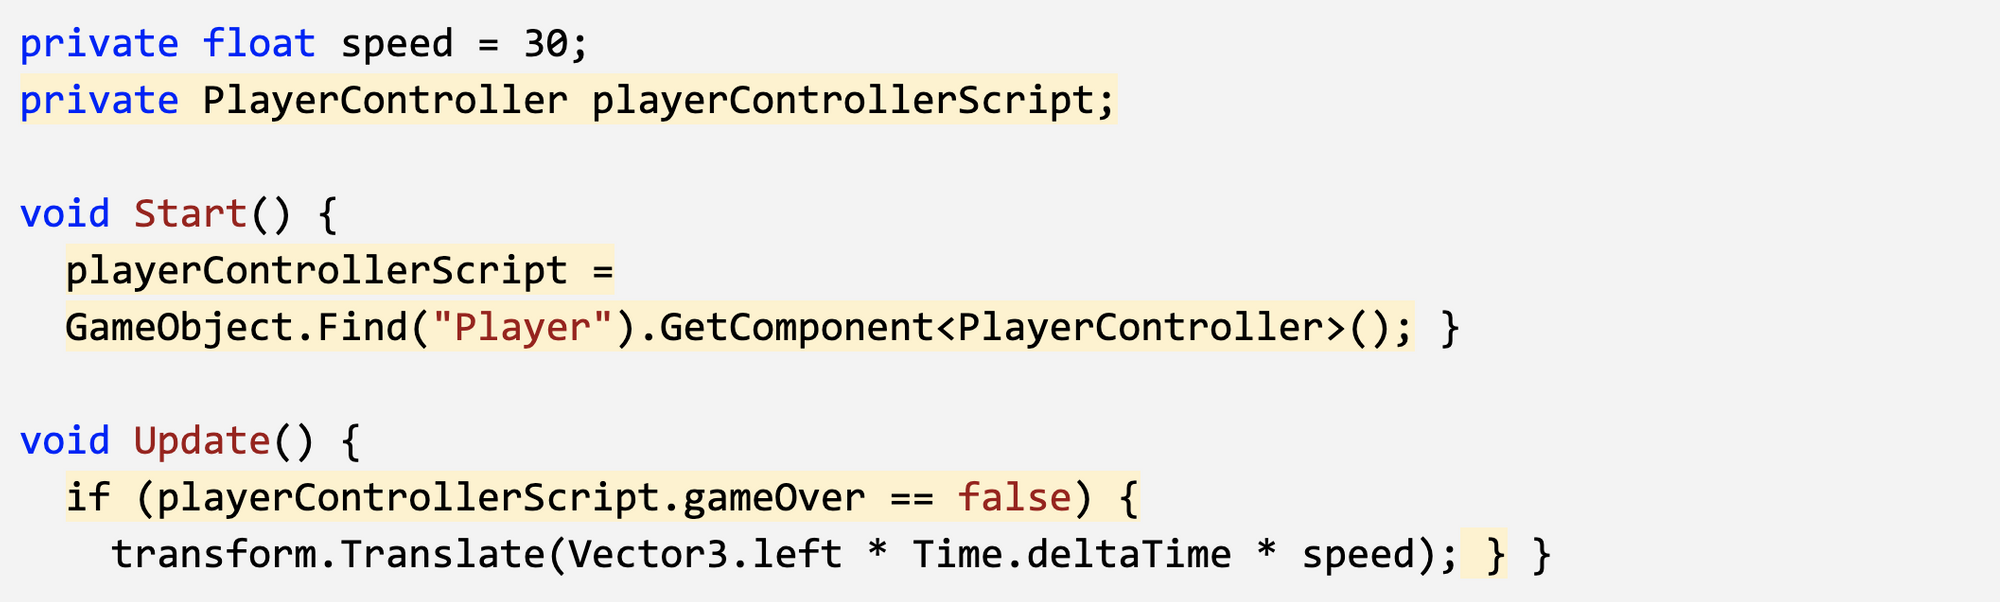
  1. In MoveLeft.cs, declare a new private PlayerController playerControllerScript;
  2. In Start(), initialize it by finding the Player and getting the PlayerController component
  3. Wrap the translate method in an if-statement checking if game is not over
Picture

Stop obstacle spawning on gameOver

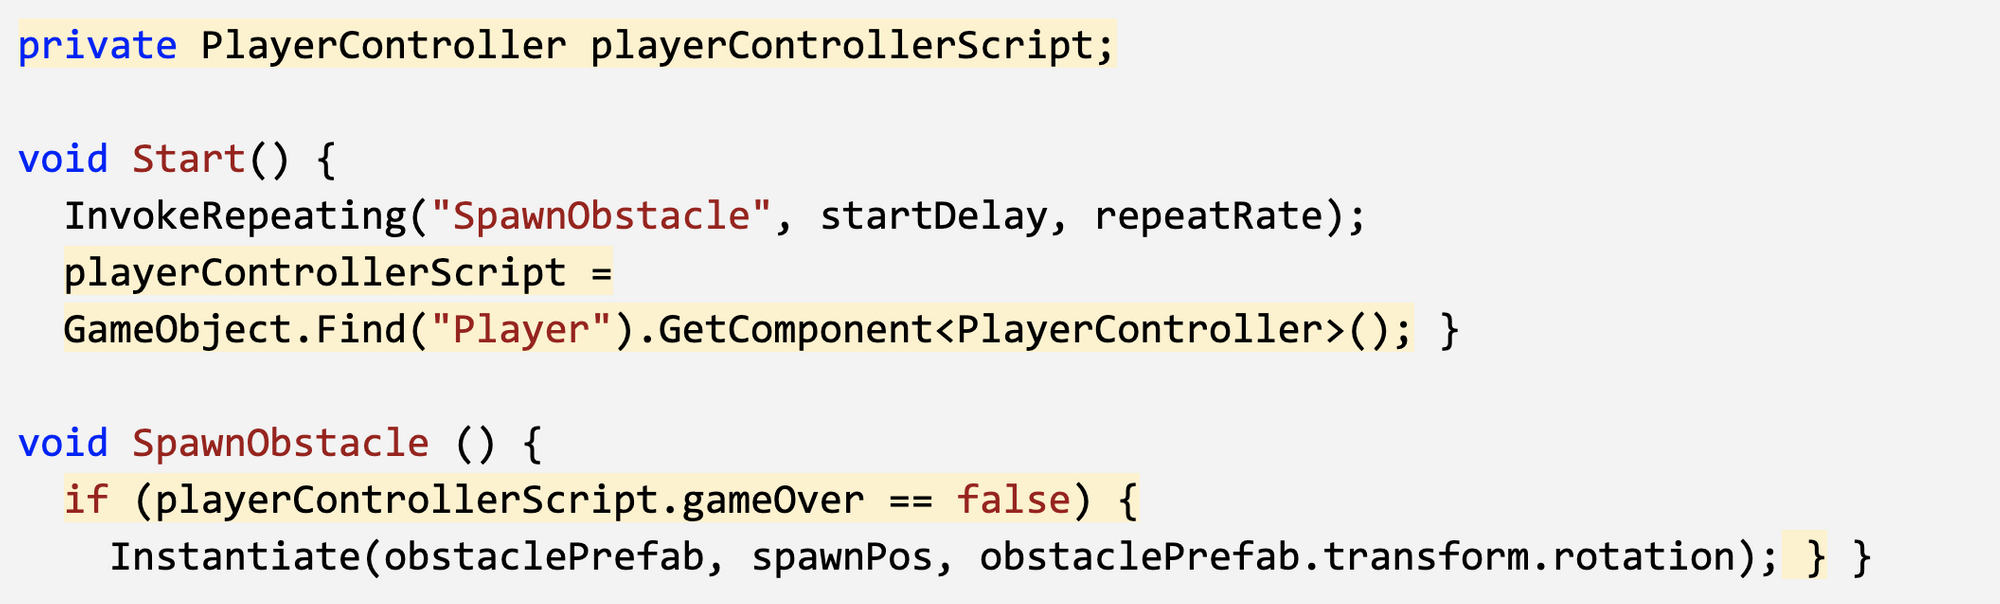
  1. In SpawnManager.cs, get a reference to the playerControllerScript using the same technique you did in MoveLeft.cs
  2. Add a condition to only instantiate objects if gameOver == false
Picture

Destroy obstacles that exit bounds

  1. In MoveLeft, in Update(); write an if-statement to Destroy Obstacles if their position is less than a leftBound variable
  2. Add any comments you need to make your code more readable
Picture
Onto the next page
Proudly powered by Weebly