Digital FXtbook
Easy Contacts
  • Home
    • Free Software
    • The Author
    • Former Students Hall of Fame
    • A tribute....
  • Animation
    • Intro to 3d >
      • AutoDesk
      • Introduction: The Temple
      • Creating a Film >
        • Scriptwriting and Planning
        • StoryBoarding
        • Story Reels
      • Modeling >
        • The Nail
        • First Freestyle Lesson >
          • Cup and Straw
          • Garbage Can
        • Fence
        • Hammer
        • House
        • Environment Bubble
      • Animation >
        • Beginning Animation
        • Animation - Walk Cycle
        • Facial Animation
      • Rendering >
        • Arnold Rendering
      • Editing film >
        • Credits
        • Video Editing
      • Characters
    • Modeling and Rigging >
      • Modeling >
        • Image Planes
        • Polygon Modeling >
          • Coke Can
          • Low Polygon Character
          • Character Modeling Legion the Geth
          • Character Modeling Geth Armor
          • Face Modeling
        • NURBS Modeling >
          • Intro to NURBS
          • Lofting
          • CV Curves
          • Organic Modeling
          • Autombile
      • 3d Coat >
        • Integration with Maya >
          • Getting stuff out of Maya
        • UV Texture Mapping >
          • Texture mapping in 3d Coat
        • 3d Painting >
          • Painting in 3d Coat
        • Reintegration with Maya
      • Rigging >
        • Rigging with HumanIK
        • Smooth Skinning
      • Motion Capture
    • 3d Animation >
      • Arnold Rendering
      • Reference Videos
      • Beginning Animation
      • Characters
  • Gaming
    • Board Game Game Design Document
    • Modeling >
      • Introduction: The Temple
      • Halo 1 Blood Gulch Base
      • Hammer
      • Sword
      • Character Modeling Big Daddy
      • Shield
      • The OM6G
      • Weapon
      • Character Modeling Legion the Geth
      • Character Modeling Geth Armor
    • Animation >
      • Character Animation
    • Rigging >
      • Rigging with HumanIK
      • Characterizing and MoCap
      • Integration with Unity
    • Unity >
      • Block Breaker >
        • Block Breaker Game #1
        • Block Breaker Game #2
        • Block Breaker Game #3
        • Block Breaker Game #4
      • Terrain
      • Importing Models
  • Coding
    • Beginning C# >
      • First Unit >
        • First Program
        • Comments
        • PsuedoCode
        • Numbers and Operators
        • Use of Parenthesis
        • Casting
        • Try and Catch
        • Operators
      • Second Unit >
        • Conditional Statements >
          • Number validator
          • Number tester
          • Speed Camera
        • Random Class
        • Loops >
          • For Loops
          • For Each Loops
          • While Loops
          • Do While Loops
        • Arrays >
          • Simple Arrays
          • Complex Arrays
      • Third Unit
    • Intermediate C# >
      • Object Oriented Programming
  • Student Films
    • Advanced Student's movies
    • Beginning Student's movies
  • Adobe
    • Photoshop >
      • Introduction
      • Selection Tools >
        • Melonhead >
          • Melonhead Creative
        • Breakfast Lunch or Dinner
        • Blu 42
      • Painting Tools >
        • Invisi-World
        • Image Adjustment
        • FreeStyle project
      • Drawing Tools >
        • Abstract Expressionism
    • Premier >
      • Project 1
    • Illustrator >
      • Vector Ninjas
      • Live Art Painting
      • Starting the Pen Tool
      • Apple and Pear
      • Creating Your LOGO
      • Self Portrait
  • Links
    • Distance Reconnecting
    • Key Board Fix/Hack
    • Buiding Piers >
      • Buiding Piers
      • Buiding Piers
    • The Top Six Animation Schools
    • The Top Video Game Design Schools
  • International Team
  • BPA
    • BPA 2017-2018 >
      • Getting organized
      • Building the Train
      • Texturing the Train
      • Animating the Train
      • Making our Entry Film
    • BPA 2018-2019
    • BPA 2019-2020
  • Arnold Lighting
  • Faculty Video
  • Velomobile
  • CTE Summer Workshop

Modeling

Polygon Modeling

Picture
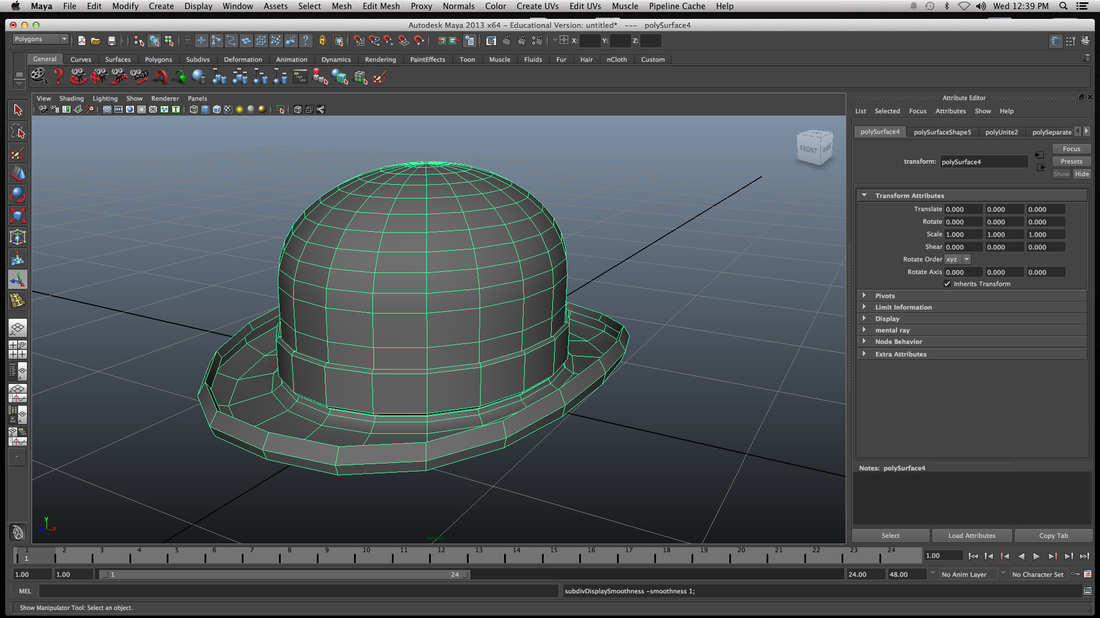
This is the absolute first step in making any project three dimensional. Modeling in of itself is making three dimensional shapes. There are three different types of geometry (what we call 3d models) that we can use. The first and most popular is Polygons. The best version of polygonal modeling is a collection of quadrilateral (4 sided) shapes that are joined together to form a 3d shape. (notice the picture above all of the collective faces only have four edges)

SubDivisions

Picture
Subdivisions is a type of geometry that is known for its smoothness.  Subdivisions usually start off life as a Polygon first. When they are almost finished they are then converted into a subdivisional surface. The faceted look of polygons disappears as a piece of geometry becomes a Subdivision and yet you can achieve creases and ridges if you want them. This is one of my favorite types of geometry.... Sad thing is they don't render well in Mental Ray, which we will learn about later.

NURBS

Picture
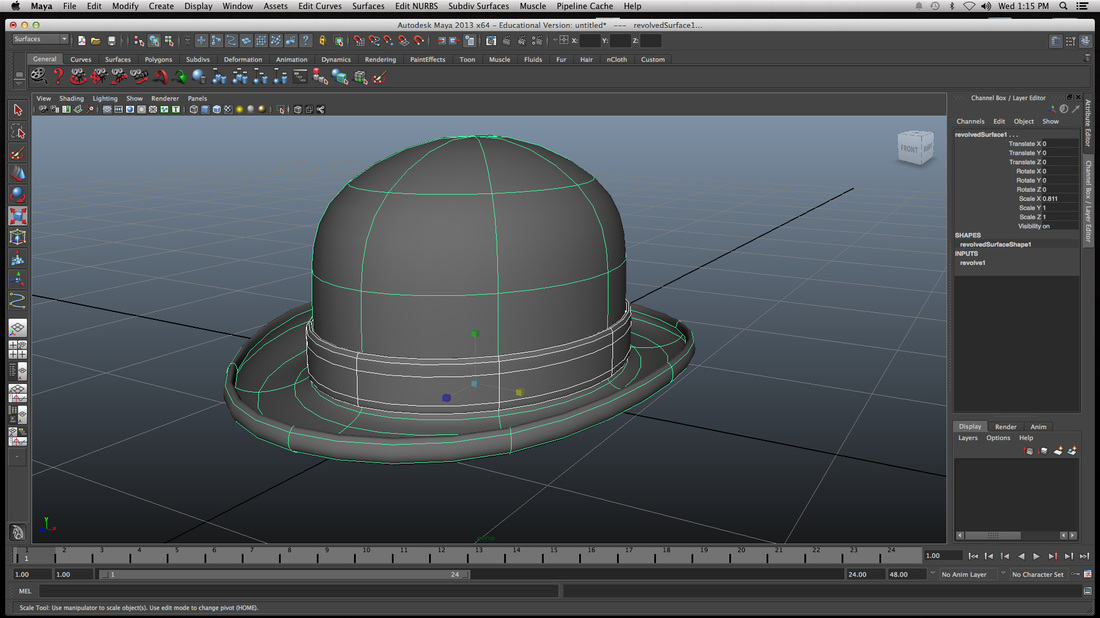
A very interesting type of Geometry.NURBS stands for Non-Unison-Rational-B-Splines. I put this in here because when you understand how NURBS are made you begin to understand how to manipulate them. NURBS start off life as a Curve or a group of curves. (Polygons start off as a face or group of faces) When these Curves (B-Splines) are attached together up and down, left to right, and forward to back, the form surfaces. Each curve can be manipulated a number of different ways making them Rational (working together); and yet I can make changes to any curve that does not change the others making them Non-Unison.


I standardly do not teach NURBS to beginning students as Polygons dominate the industry. Advanced students gain tremendous advantages in modeling by understanding how to use the strength of NURBS in their modeling projects.

Proudly powered by Weebly